Sunday 28 March 2010

TREE AMONGST GRAVES


Tree amongst graves
Originally uploaded by photoshopforartists

You are probably looking at this and thinking this is a tree in winter silhouetted against the sky - so what. There are thousands of pictures like this in flickr already. And you'd be right and I'd be thinking the same if I saw this as well. But...this was taken one very early morning with a mist rolling down the hills spilling into this graveyard where this one lone tree stood out watching over this hundreds of graves. It was a bit spooky and rather chilling so by using textures I tried to get across the eeriness and this is how I did it.

All these textures were taken from my BEST TEXTURES 2 set .
First one was:
EMERALD SHINES - overlay - 14%
SILVER SHADOW - color dodge - 97%
FADED GOLD - hard light - 79% with an adjustment layer to bring out bit of warmth in the heart of the tree.
RUSTED SLATE - overlay - 35%
WHITE OUT - linear burn - 100%

I finally duplicated the original tree layer moved it to the top of the stack, desaturated it with a hue blend mode at 51%.

I then added an adjustment curves layer and played around with the blue channel to bring out a bit of green.

Hope you like it.

You can buy the textures used in this picture by CLICKING HERE

Friday 5 March 2010

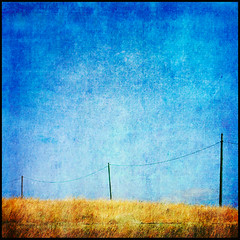
POWER LINES IN FRANCE


Power lines in France
Originally uploaded by www.photoshopforartists.com

These are some power lines I photographed while in France. I just loved the graphic nature of the poles and line against the blue sky and wheat field. A very simple picture but it really caught my eye.
This type of shot really lends itself to a texture so couldn't wait to have a go at this one.
I started with EMERALD SHINES from my BEST TEXTURES SET 2 using overlay blend mode at 100%. Then picked FADED GOLD with color burn at 43%. I then copied that layer and used soft light at 57% and added an adjustment layer to it and just let the bottom show through.
I then added the SILVER SHADOW with screen at 11%. Then I went for BUSY JADE at overlay at 74%.
To finish it off I then went for a curves layer to boost the contrast.
And that it is.

Wednesday 3 March 2010

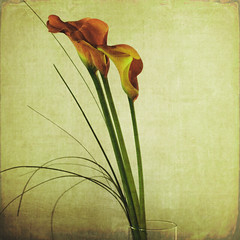
FLOWERS IN VASE


FLOWERS IN VASE
Originally uploaded by www.photoshopforartists.com

Compared to some of the other textured pictures over the last week or so this one was by far the least complex. I only used three textures and two adjustment layers. I debated having only two texture layers as well as I wasn't sure if one of them was too heavy but in the end decided to leave it in.

My first texture was SMOKEY BOOK using vivid light blend mode at 15%. I followed this with WASHME VAIL with overlay at 57% opacity. And my final texture was SAHARA MIST and blend mode soft light at 100%.

On top of all of these was two adjustment layers. One curves to give it a bit of contrast and finally a hue/saturation layer to take away a lot of the orange colour in the image.

Hope that helps and try it for yourself. My low res textures are here in my flickr stream and the high res ones are on the website www.photoshopforartists.com
Best
You can buy the textures used in this picture by CLICKING HERE
NIKILYNN INTERVIEW.


The interview with young digital photoshop artist Nikilynn is now up. CLICK HERE to see the interview.